

This will step you through the process of making a console connection to your SiteBasin server using your generated SSH key and Putty software.
The following steps describe how to connect to your SiteBasin dedicated server using Putty and SSH. Putty provides you direct console access to your server from a Windows client machine.
- Run putty via Windows Start ► Putty ► Putty
- Enter user-name@IP-Address in the Host Name field. (Replace user-name and IP-Address with the values provided by SiteBasin for your server.)
- Enter the port number that SiteBasin provided you in the Port field.
- Select the SSH radio button if it is not already selected.
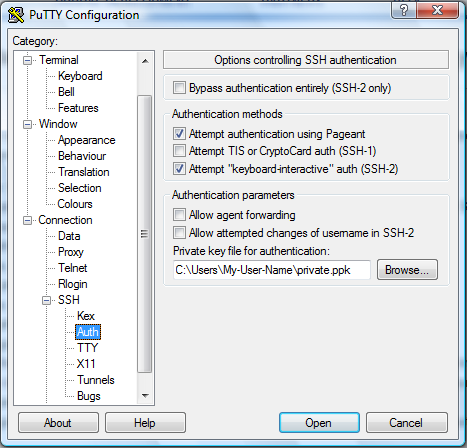
- In the left hand pane of the Putty window, click on Connection ► SSH ► Auth.
- Click the Browse button and select the private key file you saved earlier.
- In the left hand pane of the Putty window, click on Session at the top of the pane. You may need to scroll up to see it.
- Enter the name of your server in the empty field under the Saved Sessions label.
- Click the Save button to save the settings for future use.
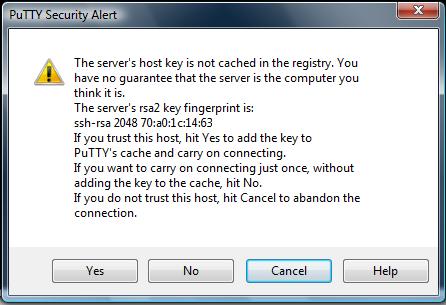
- Click the Open button at the bottom of the Putty window to open the connection. If this is the first time you are connecting to your server, you will now see a security alert box. Click the Yes button to add your server's host key to your local registry. This will prevent the alert from showing in the future.
- If you protected your private key with a passphrase, you will be prompted to enter it now.
- In the future, you can reload your settings by selecting your server from the Saved Sessions list and clicking the Load button. Then click Open to connect.